
|
|
%!s(int64=2) %!d(string=hai) anos | |
|---|---|---|
| .. | ||
| include | %!s(int64=2) %!d(string=hai) anos | |
| src | %!s(int64=2) %!d(string=hai) anos | |
| third_party | %!s(int64=3) %!d(string=hai) anos | |
| .gitignore | %!s(int64=3) %!d(string=hai) anos | |
| CMakeLists.txt | %!s(int64=2) %!d(string=hai) anos | |
| Kconfig | %!s(int64=2) %!d(string=hai) anos | |
| README.md | %!s(int64=2) %!d(string=hai) anos | |
| prj.conf | %!s(int64=2) %!d(string=hai) anos | |
README.md
Matter Telink Pump Controller Example Application
The Telink Pump Controller Example demonstrates how to remotely control a pump device. It uses buttons to test changing the pump state and device states and LEDs to show the state of these changes. This example is inherited from the "lock-app" example but modified to simulate a pump device and can be used as a reference for creating your own pump application.
Build and flash
Run the Docker container:
$ docker run -it --rm -v $PWD:/host -w /host ghcr.io/project-chip/chip-build-telink:$(wget -q -O - https://raw.githubusercontent.com/project-chip/connectedhomeip/master/.github/workflows/examples-telink.yaml 2> /dev/null | grep chip-build-telink | awk -F: '{print $NF}')Compatible docker image version can be found in next file:
$ .github/workflows/examples-telink.yamlActivate the build environment:
$ source ./scripts/activate.shIn the example dir run (replace __ with your board name, for example,
tlsr9518adk80dortlsr9528a):$ west build -b <build_target>Flash binary:
$ west flash --eraseBuild chip-tool cli
Pair with device
${CHIP_TOOL_DIR}/chip-tool pairing ble-thread ${NODE_ID} hex:${DATASET} ${PIN_CODE} ${DISCRIMINATOR}Example:
./chip-tool pairing ble-thread 1234 hex:0e080000000000010000000300000f35060004001fffe0020811111111222222220708fd61f77bd3df233e051000112233445566778899aabbccddeeff030e4f70656e54687265616444656d6f010212340410445f2b5ca6f2a93a55ce570a70efeecb0c0402a0fff8 20202021 3840- set CONFIG_CHIP_OTA_REQUESTOR=y in corresponding "prj.conf" configuration file.
- zephyr.bin - main binary to flash PCB (Use 2MB PCB).
- zephyr-ota.bin - binary for OTA Provider
Build the Linux OTA Provider
./scripts/examples/gn_build_example.sh examples/ota-provider-app/linux out/ota-provider-app chip_config_network_layer_ble=falseRun the Linux OTA Provider with OTA image.
./chip-ota-provider-app -f zephyr-ota.binProvision the Linux OTA Provider using chip-tool
./chip-tool pairing onnetwork ${OTA_PROVIDER_NODE_ID} 20202021here:
- \${OTA_PROVIDER_NODE_ID} is the node id of Linux OTA Provider
Configure the ACL of the ota-provider-app to allow access
./chip-tool accesscontrol write acl '[{"fabricIndex": 1, "privilege": 5, "authMode": 2, "subjects": [112233], "targets": null}, {"fabricIndex": 1, "privilege": 3, "authMode": 2, "subjects": null, "targets": null}]' ${OTA_PROVIDER_NODE_ID} 0here:
- \${OTA_PROVIDER_NODE_ID} is the node id of Linux OTA Provider
Use the chip-tool to announce the ota-provider-app to start the OTA process
./chip-tool otasoftwareupdaterequestor announce-otaprovider ${OTA_PROVIDER_NODE_ID} 0 0 0 ${DEVICE_NODE_ID} 0here:
- \${OTA_PROVIDER_NODE_ID} is the node id of Linux OTA Provider
- \${DEVICE_NODE_ID} is the node id of paired device
Usage
UART
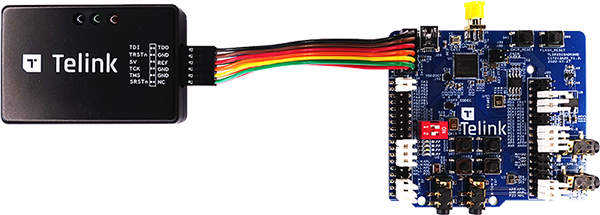
To get output from device, connect UART to following pins:
| Name | Pin |
|---|---|
| RX | PB3 (pin 17 of J34 connector) |
| TX | PB2 (pin 16 of J34 connector) |
| GND | GND |
Buttons
The following buttons are available on tlsr9518adk80d board:
| Name | Function | Description |
|---|---|---|
| Button 1 | Factory reset | Perform factory reset to forget currently commissioned Thread network and back to uncommissioned state |
| Button 2 | Lock control | Manually triggers the bolt lock state |
| Button 3 | Thread start | Commission thread with static credentials and enables the Thread on device |
| Button 4 | Open commission window | The button is opening commissioning window to perform commissioning over BLE |
LEDs
Indicate current state of Thread network
Red LED indicates current state of Thread network. It is able to be in following states:
| State | Description |
|---|---|
| Blinks with short pulses | Device is not commissioned to Thread, Thread is disabled |
| Blinks with frequent pulses | Device is commissioned, Thread enabled. Device trying to JOIN thread network |
| Blinks with wide pulses | Device commissioned and joined to thread network as CHILD |
Indicate identify of device
Green LED used to identify the device. The LED starts blinking when the Identify command of the Identify cluster is received. The command's argument can be used to specify the the effect. It is able to be in following effects:
| Effect | Description |
|---|---|
| Blinks (200 ms on/200 ms off) | Blink (Clusters::Identify::EffectIdentifierEnum::kBlink) |
| Breathe (during 1000 ms) | Breathe (Clusters::Identify::EffectIdentifierEnum::kBreathe) |
| Blinks (50 ms on/950 ms off) | Okay (Clusters::Identify::EffectIdentifierEnum::kOkay) |
| Blinks (1000 ms on/1000 ms off) | Channel Change ( Clusters::Identify::EffectIdentifierEnum::kChannelChange) |
| Blinks (950 ms on/50 ms off) | Finish ( Clusters::Identify::EffectIdentifierEnum::kFinishEffect) |
| LED off | Stop (Clusters::Identify::EffectIdentifierEnum::kStopEffect) |
Indicate current Pump state
White LED shows current state of Pump (running/stopped)
CHIP tool commands
OTA with Linux OTA Provider
OTA feature enabled by default only for ota-requestor-app example. To enable OTA feature for another Telink example:
After build application with enabled OTA feature, use next binary files:
All binaries has the same SW version. To test OTA “zephyr-ota.bin” should have higher SW version than base SW. Set CONFIG_CHIP_DEVICE_SOFTWARE_VERSION=2 in corresponding “prj.conf” configuration file.
Usage of OTA:
Once the transfer is complete, OTA requestor sends ApplyUpdateRequest command to OTA provider for applying the image. Device will restart on successful application of OTA image.